The first step of printing is to send a document or file to the print queue. There are three ways to do this.
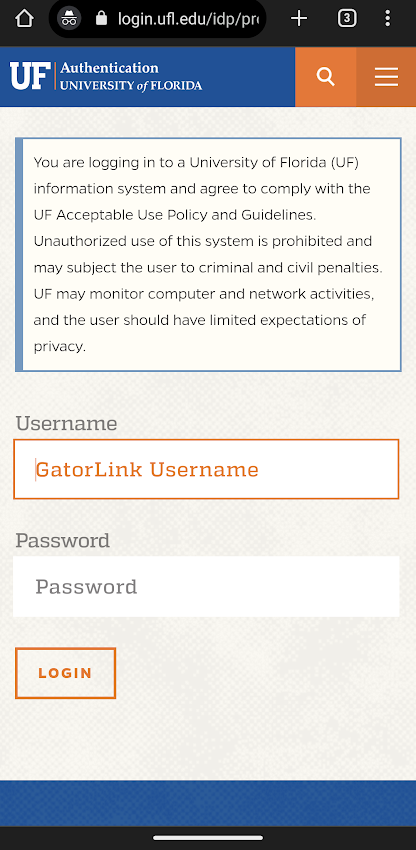
1. Visit the GatorPrint website. You will be directed to log in/authenticate via Multi-Factor Authentication.
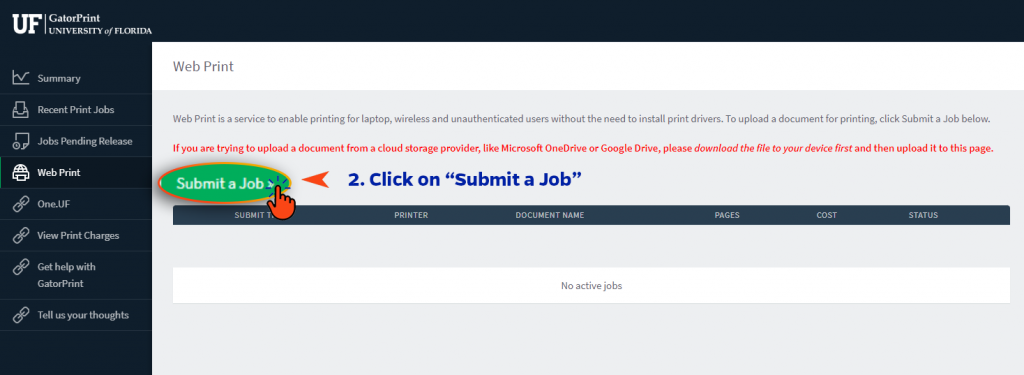
2. After the browser returns to GatorPrint, click on “Submit a Job”
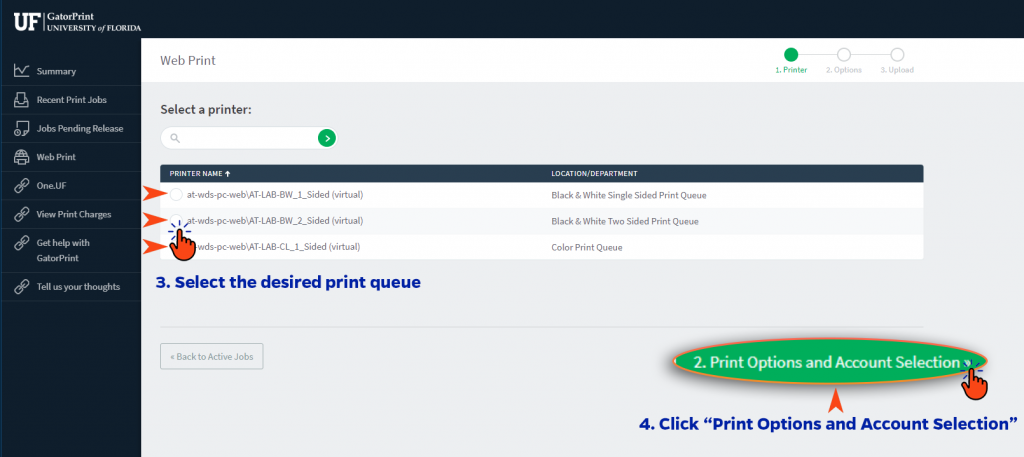
3. Select the desired print queue
4. Click “Print Options and Account Selection”
5. Specify the number of document copies you want.
6. Click “Upload Documents”

7a. Drag and drop the desired file into the provided box OR
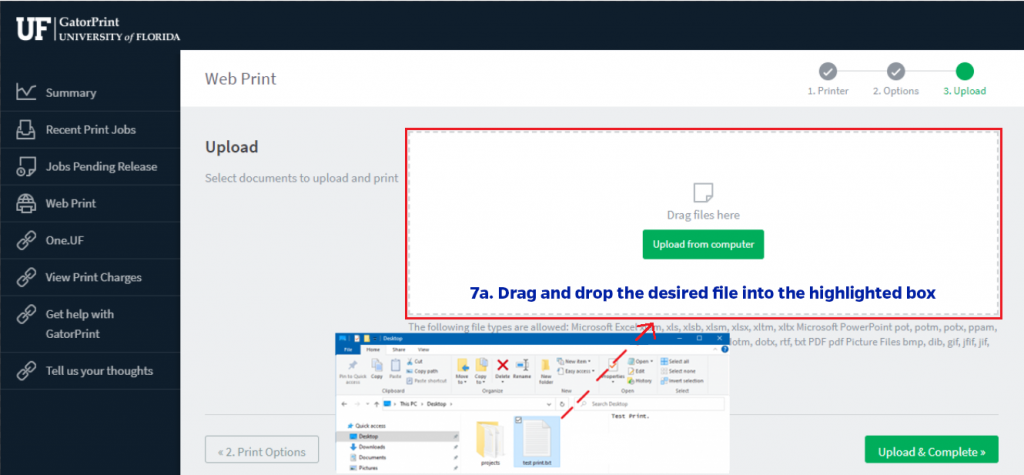
7b. Click “Upload from computer” and select your file.
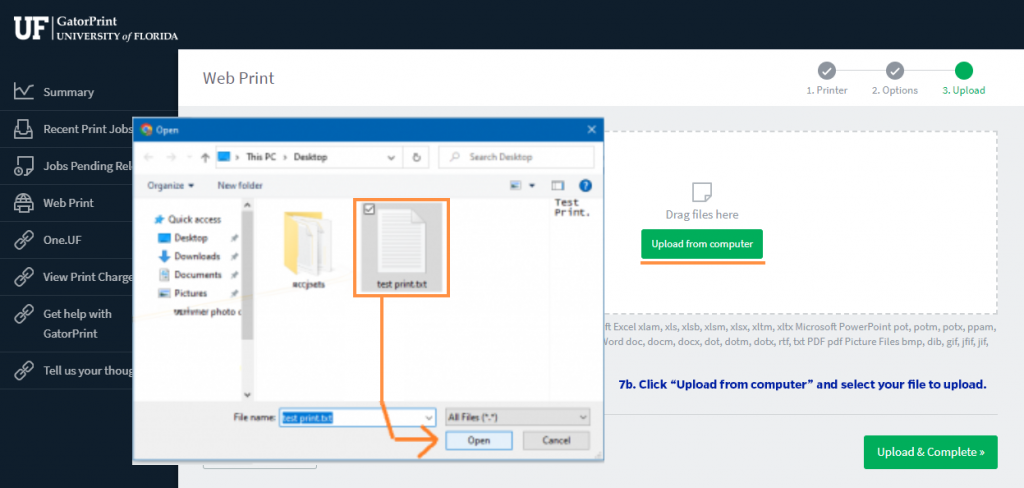
8. Click “Upload & Complete”
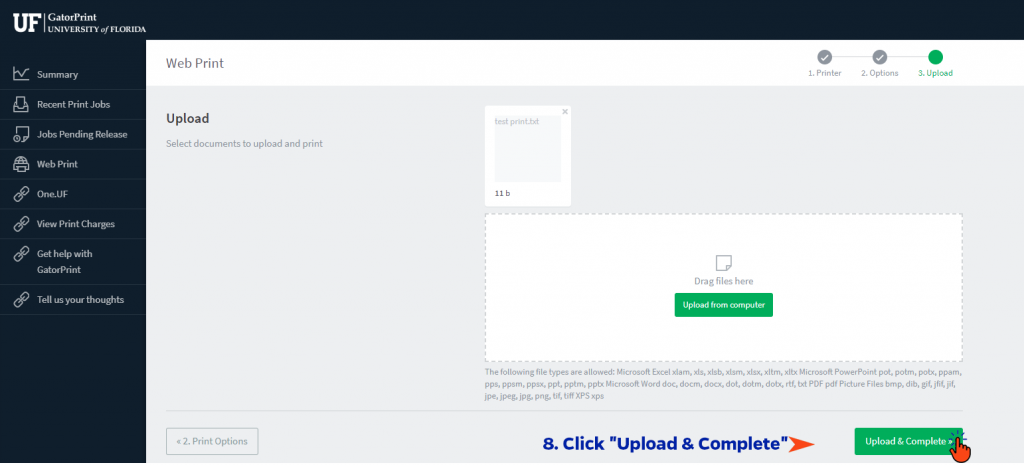
9. Proceed to Releasing your print job
1. Select the desired print queue from the printer menu, such as:
- Black & White One-Sided: AT-LAB-BW_1_Sided
- Black & White Two-Sided: AT-LAB_BW_2_Sided
- Color: AT-LAB-CL_1_Sided
- Large Format Poster: AT-LAB-Plotter
2. After choosing a print queue, your print job should be available for release shortly.
3. Proceed to Releasing your print job
Just like you would send any other email with an attachment, you can send an email to GatorPrint with your document or file.
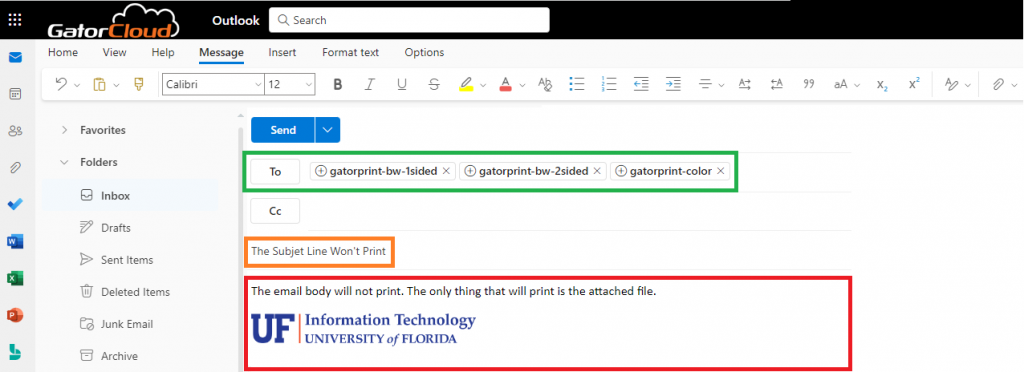
You must use your UF email account (@ufl.edu)
Only the attached file will be printed.
Green Box
Send the email to the appropriate address for your printing needs:
- Black & White One-Sided – gatorprint-bw-1sided@ufl.edu
- Black & White Two-Sided – gatorprint-bw-2sided@ufl.edu
- Color – gatorprint-color@ufl.edu
Orange Box
Anything in the subject line will not be printed.
Red box
Anything in the email body will not be printed.
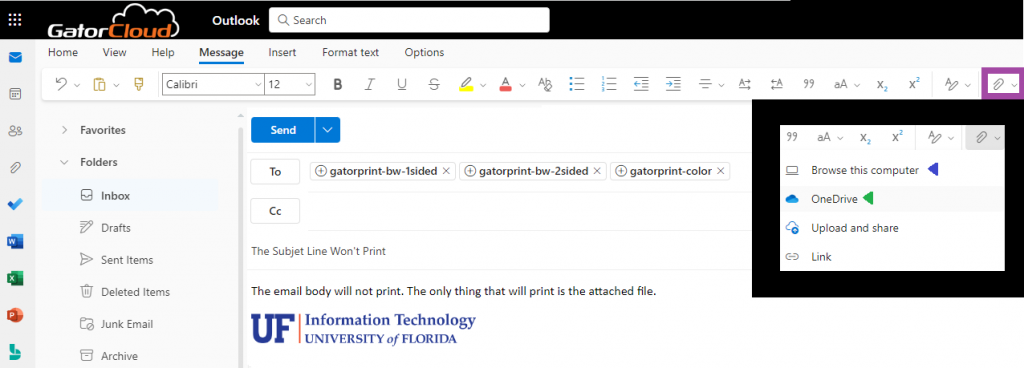
Attaching a file (purple box)
There are two ways to attach a file to your email.
- Browse this computer: Locate your file on your device .
- OneDrive: This is where you can attach a file from your Gator Approved Cloud Storage!
Attaching a file via Cloud Storage
After you clicked on OneDrive in the email attachment icon a window will open similar to the one below.

- It will by default start in your OneDrive. However, using the tabs on the left you can choose to link your Gator Approved Google Drive or Dropbox accounts.
- On the left of the file you want to attach, click the empty checkbox. It will turn blue indicating that you have selected it.
- Now at the bottom look at the “Share link” button. Just to the right is a down arrow, click that and then click the “Attach” that comes up.
If you do not attach the file but rather click “Share link” the file will not attach to your email and the file will not enter the print queue.
Lastly, proceed to Releasing your print job to complete your printing journey.
